

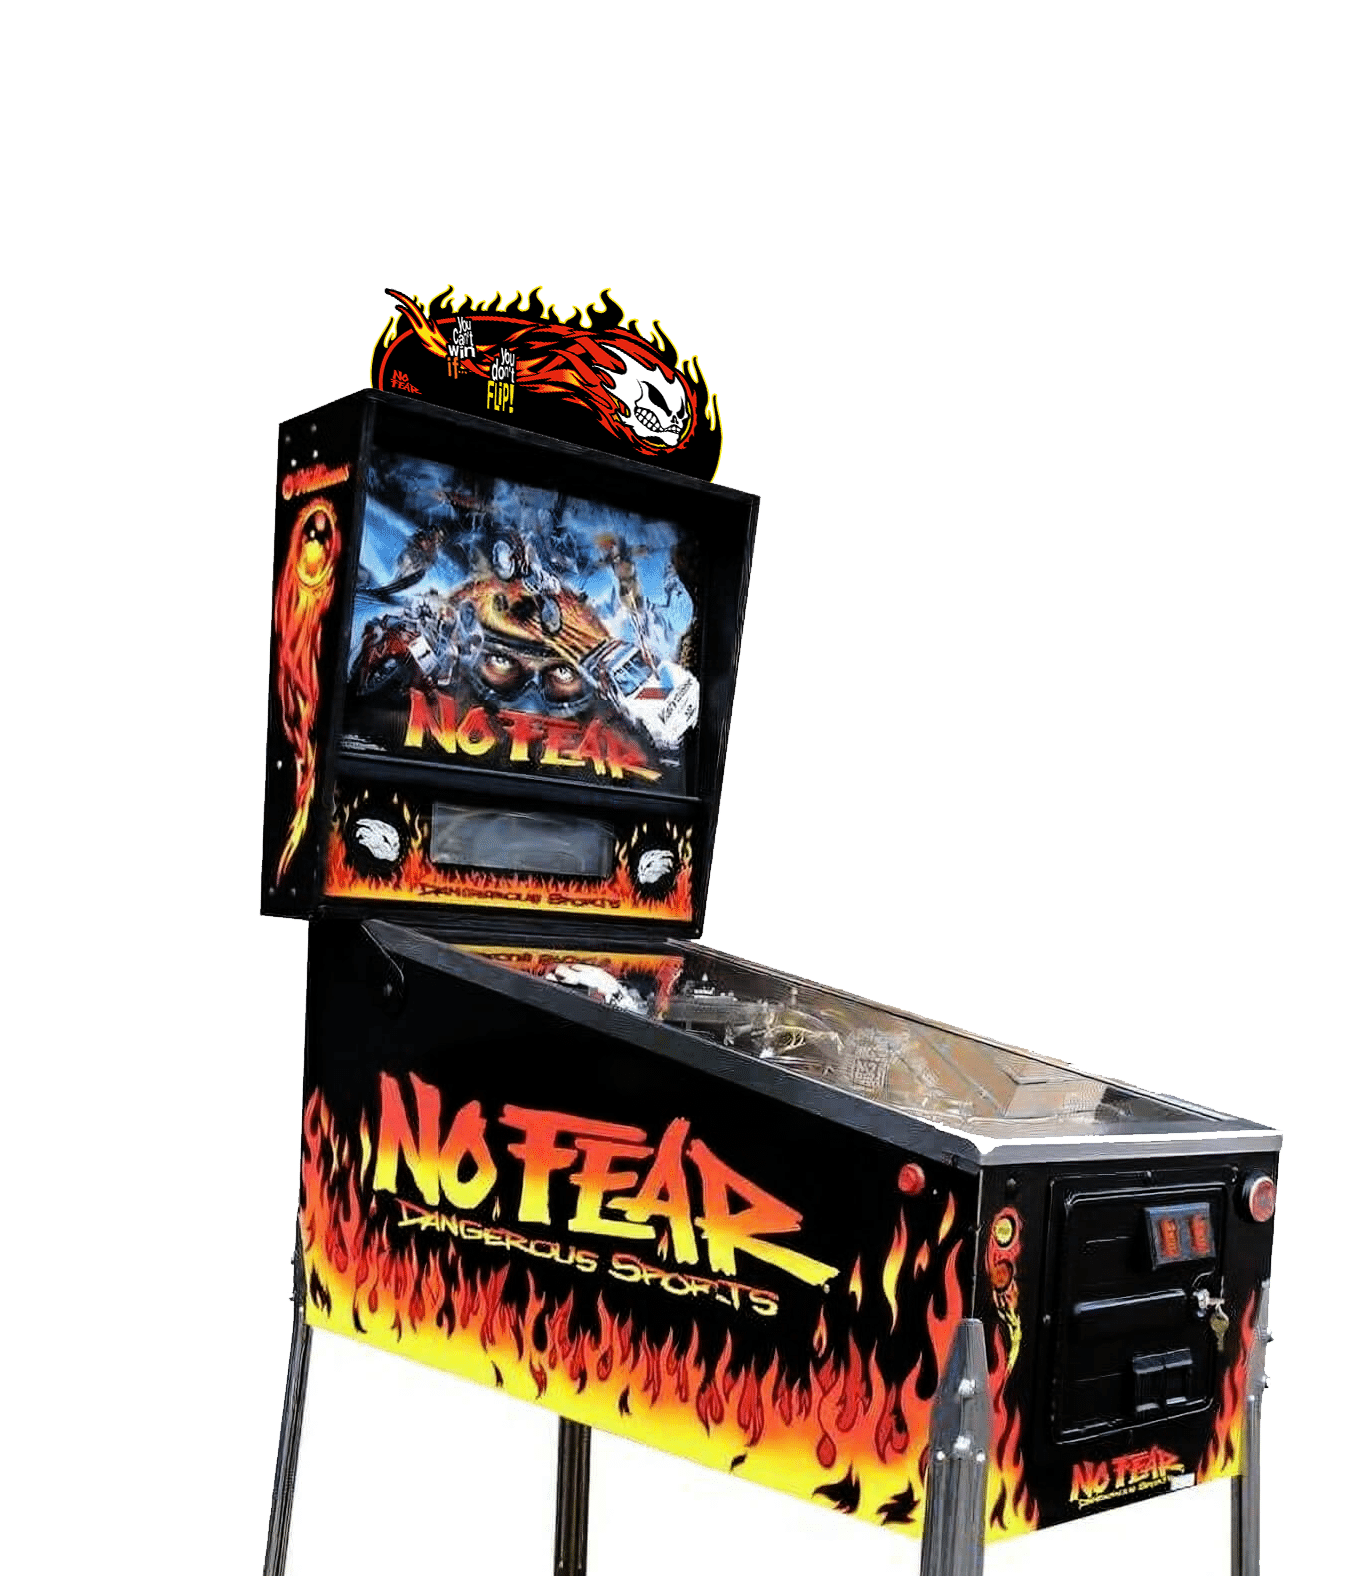
Topper No Fear
€80,00
3 mm Plexiglass Pinball Topper featuring high-definition printing and custom-shaped cutting that follows the contours of the artwork, designed to extend your machine’s visual theme above the backbox.
Custom-shaped design: Each topper features a silhouette tailored to its illustration for a distinctive appearance that perfectly complements the pinball theme.
Easy installation: The topper mounts above the backbox using the supplied 3D-printed mounting rail and two screws. No electrical connection required.
Package contents:
- 1 x 3 mm printed plexiglass topper, custom-cut to shape
- 1 x 3D-printed mounting rail
- 2 x Mounting screws
👉 Please refer to the long description for specifications and detailed installation instructions.
Description
3 mm Plexiglass Pinball Topper – Custom-Shaped Design with Mounting Kit Included
Give your pinball machine a whole new dimension with our 3 mm plexiglass decorative toppers, designed to extend your machine’s visual theme above the backbox. Thanks to their high-definition printing and custom-shaped cutting that follows the contours of the artwork, they instantly add more character and personality to your gameroom.
Unlike a simple rectangular panel, each pinball topper features a silhouette precisely cut to match its illustration. Characters, logos, creatures and iconic elements from the game can therefore take their place at the top of your machine, naturally complementing its overall appearance.
And let’s be honest: when you already own a pinball machine that attracts everyone’s attention, you might as well give it a little crown. A plexiglass crown, admittedly, but a crown nonetheless!
A Topper Custom-Cut to Match Each Design
What makes our toppers special is their custom-shaped cutting that follows the exact contours of the artwork. Each model therefore features a unique silhouette directly related to the theme of the corresponding pinball machine.
This technique highlights characters, illustrations and graphic elements without retaining the large unnecessary areas of a traditional rectangular panel.
The result is a more dynamic silhouette and better visual integration above the backbox.
Furthermore, custom-shaped cutting creates a genuine extension of the machine’s artwork. The topper therefore looks less like a simple sign placed on top of the pinball machine and more like an element specifically designed to complement its identity.
Rigid 3 mm Plexiglass and High-Definition Printing
Each Pinball Custom topper is made from a rigid 3 mm thick plexiglass panel. This material offers an excellent balance between rigidity, lightweight construction and presentation quality.
The artwork benefits from high-definition printing that enhances the colors, contrasts and details of the illustration.
We then cut the panel along the contours of the artwork to create the distinctive silhouette of the selected model.
This combination of printing and precision cutting produces a carefully finished decorative topper that becomes particularly eye-catching when installed above the backbox.
Unlike an illuminated topper, this model requires no electrical connection. Its visual impact comes entirely from its artwork, colors and shape.
No additional cables, no power supply and, most importantly, no new opportunity to wonder why three mysterious wires are left over after reassembly.
A 3D-Printed Mounting Rail Included
Because a beautiful topper isn’t particularly useful if you then have to invent a way to keep it standing, we include a mounting kit with every model.
This kit includes a 3D-printed mounting rail and two mounting screws.
The rail holds the topper securely and makes installation above the backbox easier. You therefore receive the mounting components designed for the product without having to manufacture your own support.
This solution provides a clean and discreet presentation. It also keeps the focus on the artwork rather than the mounting system.
An Accessory Designed to Complement Your Pinball Theme
Our decorative pinball toppers complement a wide variety of themes, including movies, science fiction, horror, music, adventure, superheroes and classic pinball machines.
Each illustration reflects the visual atmosphere of the corresponding model. The topper therefore blends naturally with the backbox, cabinet and other decorative elements of the machine.
You can also combine it with other customization accessories, such as decals, apron covers, shooter knobs or 3D mods.
The result is a consistent decorative style, particularly appealing to collectors who want to create a harmonious appearance throughout their gameroom.
After all, customizing a pinball machine often starts with one small accessory. Then a second. Then a third. And suddenly, you find yourself very seriously explaining why every machine deserves its own complete decorative theme.
Installing the Topper Above the Backbox
Each topper comes with its 3D-printed mounting rail and two screws. The mounting system allows the decoration to be positioned above the backbox.
Before installation, check that your machine has a suitable mounting location and that the fixing system can be installed correctly.
Step 1 – Prepare Your Machine
- Completely switch off your pinball machine before handling any components.
- Check that the top of the backbox is clean and easily accessible.
- Make sure there is enough space above the machine to accommodate the topper.
- Also check the available height beneath shelves, ceilings or other elements in your gameroom.
- Prepare the topper, the 3D-printed mounting rail and the two supplied screws.
Tip: If your pinball machine is positioned beneath a shelf, check the available height before starting. A beautiful topper that doesn’t fit under the furniture is immediately a little less practical.
Step 2 – Position the Mounting Rail
- Identify the intended location for the mounting rail on top of the backbox.
- Test-fit the support to check its orientation.
- Make sure the topper can be positioned correctly and remain centered above the machine.
- Check that the installation does not obstruct any openings, ventilation areas or other backbox functions.
- Prepare the two supplied screws to secure the support according to the intended mounting configuration.
Step 3 – Install and Secure the Topper
- Position the mounting rail according to the supplied mounting system.
- Use the two screws to secure it at the designated fixing points.
- Tighten gradually without applying excessive pressure to the 3D-printed support.
- Then install the topper into its mounting system.
- Check its alignment and centering in relation to the backbox.
- Make sure the plexiglass panel is securely held in place.
Important: Never force the plexiglass or mounting rail during installation. If a component resists, check its orientation and positioning before continuing.
Step 4 – Check Stability
- Check that the topper is securely held in its support.
- Make sure the mounting rail has no excessive movement or looseness.
- Ensure that the topper does not touch any nearby furniture or objects.
- Check its alignment one final time.
- Once installation is complete, switch your pinball machine back on and enjoy its new silhouette.
The topper must remain stable and securely attached. Avoid moving the machine by grabbing the topper or its mounting support.
And that’s it! Your pinball machine now features an additional decorative element above its backbox. No wiring to install, no LEDs to connect and absolutely no engineering degree required.
Specifications:
- Product: Decorative Pinball Topper
- Material: Rigid plexiglass
- Thickness: 3 mm
- Printing: High definition
- Cut: Custom-shaped to follow the artwork contours
- Design: Adapted to the corresponding pinball theme
- Mounting: 3D-printed mounting rail
- Hardware: 2 mounting screws included
- Installation: Above the backbox
- Lighting: No integrated lighting system
- Power supply: No electrical connection required
- Dimensions: Vary depending on the topper model
Why Choose a Pinball Custom Topper?
- Custom-shaped cutting: A silhouette tailored to each illustration for a more immersive appearance.
- 3 mm plexiglass: Rigid material with excellent presentation quality.
- High-definition printing: Enhanced colors, contrasts and graphic details.
- Mounting kit included: 3D-printed mounting rail and two supplied screws.
- Straightforward installation: Mounts above the backbox without any electrical connection.
- Themed customization: Complements your pinball machine’s visual universe.
- Eye-catching decoration: Adds a new dimension to your machine’s silhouette.
Package Contents:
- 1 x 3 mm printed plexiglass pinball topper, custom-cut to match the artwork
- 1 x 3D-printed mounting rail
- 2 x Mounting screws
Important: This topper is a non-illuminated decorative accessory. It does not include LEDs, a lighting system or a power supply. Its shape and dimensions vary depending on the corresponding pinball model.
Note: Slight color differences may occur between the on-screen display and the finished product. To preserve the plexiglass and its printing, use a soft microfiber cloth and avoid abrasive cleaning products or solvents.
With our 3 mm Plexiglass Pinball Topper, extend your machine’s visual theme beyond the backbox. High-definition printing, custom-shaped cutting and an included mounting kit: everything you need to give your pinball machine a striking new presence in your gameroom.